- Get shipment info ready, ask for tentative quotes.
- Compare service and rates from multiple sources (AGL, 3pl, supplier etc.), choose potential carrier.
- Create shipments under Amazon seller central
- Get your shipments labelled.
- Confirm final rates with carrier.
- Get shipments and products inspected before give it a go.
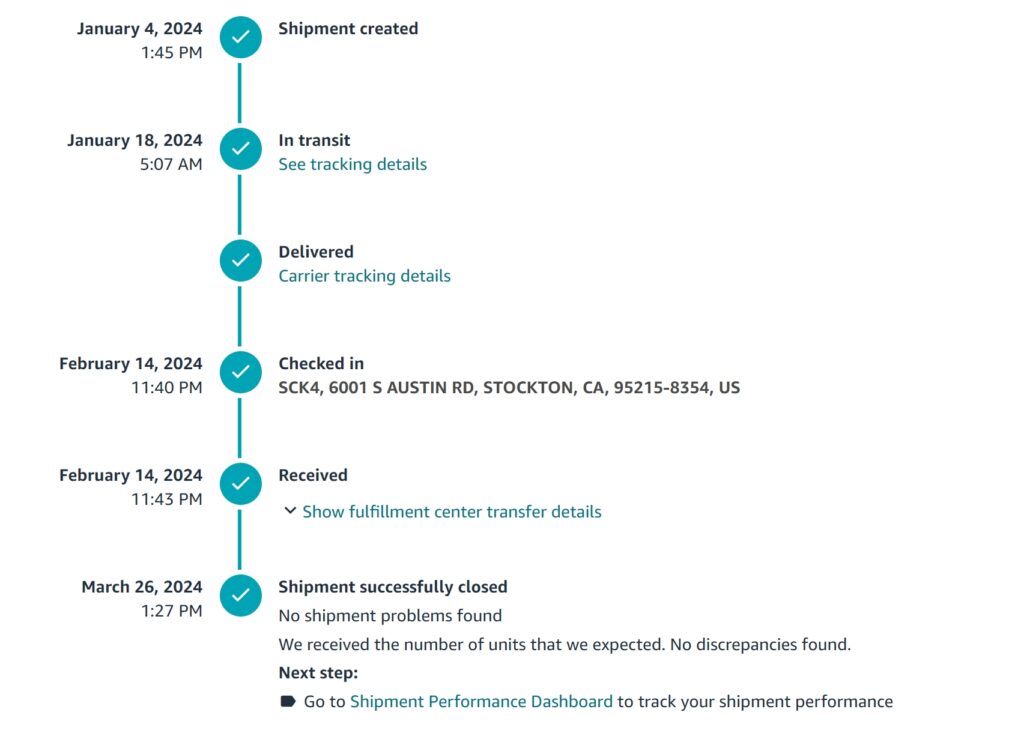
- Enter tracking info under Amazon Seller Central. Get updates / check status.
- Get checked in. Fix problems if any. Give access to other only when you feel comfortable.
Step 1: Get Quotes
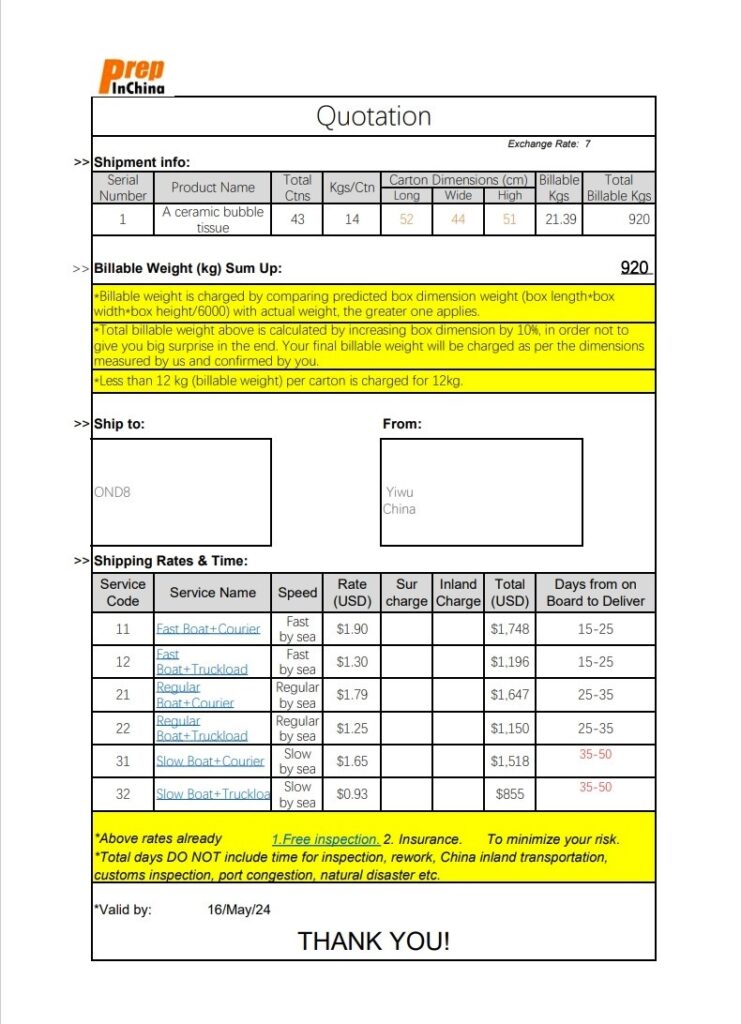
Usually you need to get some tentative quotes in advance to select potential carriers.
If you use AGL(Amazon Global logistics), you should get shipping price under amazon seller central easily. You can also have shipping rates listed on sites like Alibaba, but their rates can be way too high and not accurate.
You can also ask for shipping quotes from your supplier. The advantage is you don’t need to offer product information and package information as your supplier already have it. The disadvantage can be their quote is high and are of only limited options.
Asking quotes from a 3PL forwarder or carrier can be a good option. The disadvantage is you need to provide product information plus package information in order to get a more accurate quote; While the advantage is you can probably get complete quotes with value added services like insurance, inspection etc.
Step 2: Decide Carrier
Generally speaking, AGL(Amazon Global Logistics) has better rates and locations. However, it is not easy to work with them. Their services are quite standard. If you have big FCL(full container load) shipments from a single location, plus you have enough inventory (say 3 months), then it should be fine to use AGL. When you have small shipments in a hurry, esp. for new start up or testing shipments, it usually works better with 3pl forwarders.
Your supplier/factory usually also works with their own forwarders who can give quotes. But if you prefer direct faster communication, plus more professional services, you may consider using your own forwarder as carrier.
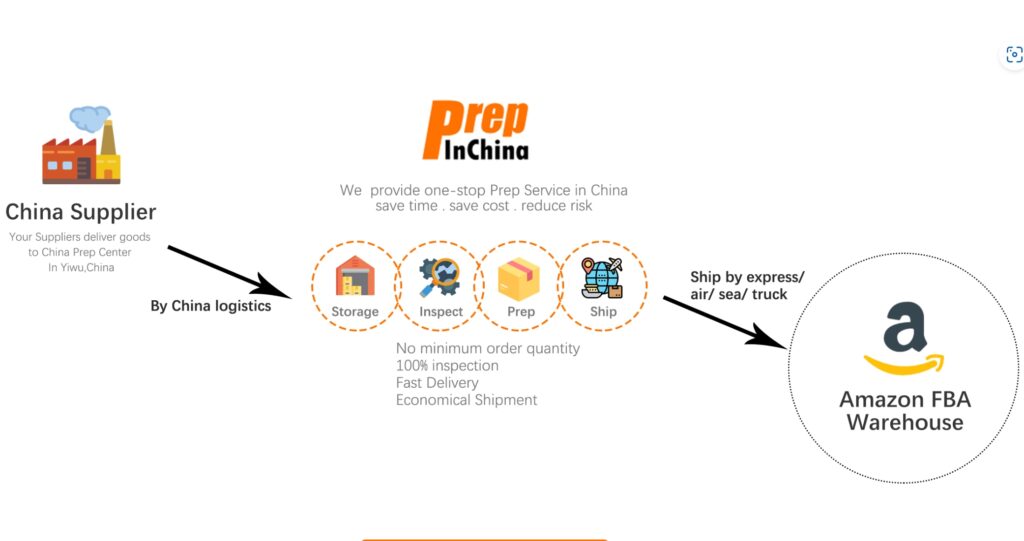
3pl forwarder is easier to work with. Their rates are usually good, esp. some forwarders or prep centers are offering full support services like sourcing products, small shipments consolidation, short term storage, prep and labelling, kitting and bundling, inspection etc. which can be useful to Amazon sellers in long term. Can be good options too.
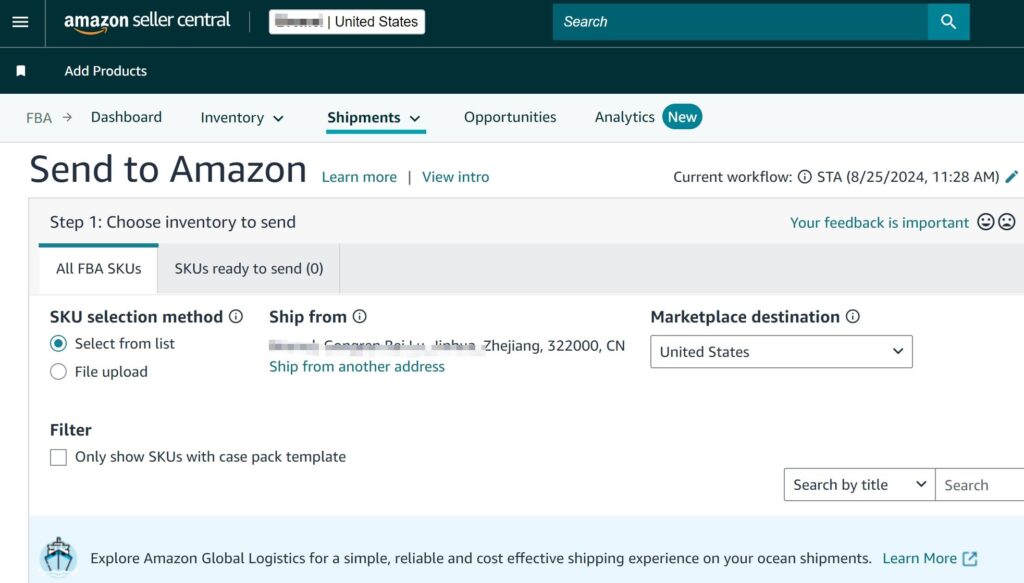
Step 3: Create Shipment and Print Labels
This step is pretty easy and straight forward. You need to log into your Seller Central, select what you want to send to Amazon FBA then create the shipments.
Step 4: Label Shipments
Once shipments are created and shipping labels generated, you need to pass this to your supplier and get them labeled.
If your supplier is not familiar with how to do this, you can either advise them by yourself or get them coached by a 3p coaching service provider in China. Usually your 3pl forwarder or prep center can offer this.
The bottom line is to let your supplier send shipments to your 3pl forward or prep center in China who can usually label for you at a fairly cheap price. But the best practice is to let your supplier label because this will save costs in long run. They can label them before they finish production and packing products.
Step 5: Confirm Rates:
By this stage, you already have all information about your shipments, including destination Amazon warehouses addresses and the quantities. It’s time to get accurate quotes from different sources (AGL, your supplier and 3pl forwarder) and compare.
It is advised to have the best value for money services, to save money for long term. Price, time, reliability, and value added services are usually the main points to be considered at this stage.
Step 6: Inspection
There are basically 2 types of inspections for shipments going to Amazon FBA: Inspect in Factory and Inspect in FF (freight forwarder) warehouse.
Usually, for large and complicated shipments that are likely to have costly problems, inspection is done before they leave factories; For small and low risk shipments, inspection can be done in carrier (3pl freight forwarder) facility, to save cost and time.
These inspections are usually to check products quality and packaging conditions, esp. barcodes, labels, size and weights are in compliance with Amazon rules.
You can hire inspection service from inspecting companies or from your forwarder / prep centers who are familiar with products inspection and Amazon FBA inspection.
Step 7: Tracking
Once all shipments are inspected and problems are fixed, you can release your shipments to get them on board to Amazon.
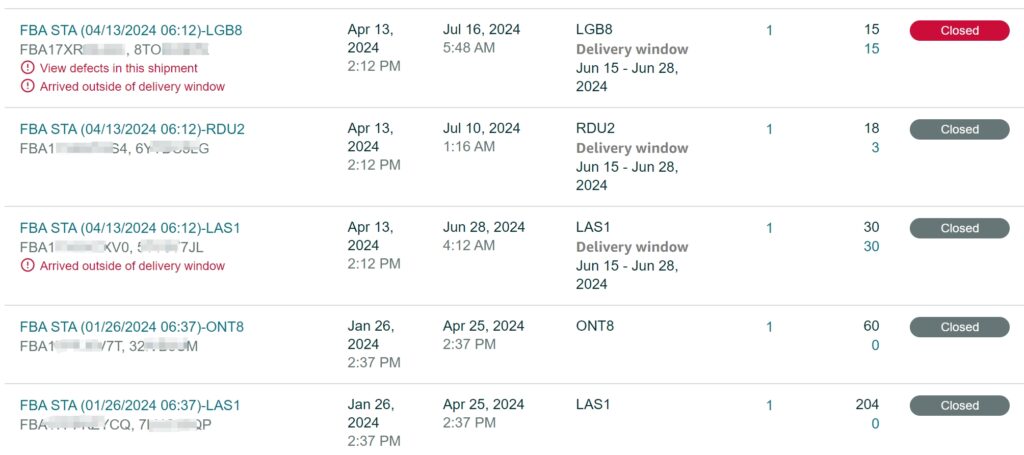
Your carrier will then offer you tracking information to input under Amazon Seller Central. You can track your shipment status or get updated of your shipment status and adjust the delivery window in when needed.
Step 8: Checked In
Finally, your shipments should be checked in Amazon FCs without anything marked red. Congratulations!
If there are any problems pops out, you will need to fix them. Sometimes with help from your partners.
Once the trust between you and your forwarder or your prep center is established, you can give them access to your Amazon account to take care of your shipments. They can do from creating shipping plans till your shipments get checked in. Can also assist with fixing problems if there are.
You can focus on the selling and branding etc., to sell more.
